Showing posts with label Artichokes. Show all posts

Monday, September 28, 2015

What's For Dinner #1: The Cheesecake Factory Fire Roasted Artichoke

Aren't they attractive vegetables?

The Cheesecake Factory Fire Roasted Artichoke has always been one of my favorite things EVER.  Just ask my husband or any of my friends and family - it is physically impossible for me to dine at the Cheesecake Factory without ordering this.  Plus, as any artichoke lover knows, it is very rare for artichokes to be served whole at a restaurant.  

So here is how you can re-create this amazing dish in the comfort of your own home.  I also want to brag that this recipe was taken from a very reliable Cheesecake Factory source, so it's legit people!  :)

Ingredients:
  • Artichokes (1 per person).  Note that 3 halves are usually served in the Cheesecake Factory dish...!
  • Olive Oil
  • Salt
  • Pepper
  • Aioli:
    • Mayo
    • Olive Oil
    • Salt
    • Pepper
    • Lemon juice
    • Parsley (chopped)
    • Minced Garlic

Instructions:
Just like in my Perfect Artichoke recipe, start by trimming the thorny ends of your artichoke leaves.  This is not required, but certainly makes for a more attractive presentation (not to mention a more comfortable eating experience).  


You'll also want to cut off the top 1 inch or so of the artichoke, as shown in this picture:


Next, cut off the stem of the artichoke.  I personally do not like eating the stem, but my husband does.  If you choose to, you'll just need to peel down the stem (using a vegetable peeler) since it has such a tough and stringy exterior.

Next, boil the artichokes for 20 minutes.


When the artichokes are tender after boiling in water, set them aside to let them drip dry.  The Cheesecake Factory apparently drip dries them for 2 hours... but I definitely did not do this...!  (Who has time for that??)  Regardless, as soon as the chokes are relatively dry, cut them in half.


Since the artichokes are now tender, you'll be able to easily scoop out the center thorny portions with a spoon.


Lay the hollowed out artichokes on a baking sheet, and broil them for about 10 minutes.  Make sure you keep an eye on them during this time - the broiling is to get a nice charr on them for coloring and for flavor!  The Cheesecake Factory likely grills the artichokes at this stage instead of broiling them, but I am not the best with a grill... so my Fire Roasted Artichokes were technically Oven Roasted.  If you know your way around a grill, by all means - grill away!  (You'll want to drizzle the chokes with olive oil and salt/paper before grilling or broiling!)


Now, time to make the Cheesecake Factory garlic aioli!  Full disclosure - I am aware that the Cheesecake Factory typically serves their artichokes with not one but TWO delicious dipping sauces. I'm afraid I only have the recipe for the garlic aioli, but if anyone out there has the recipe for the vinaigrette, please let me know!!  (BTW, there have been times where I am only served 1 dipping sauce when dining at Cheesecake - if this happens to you, YOU'RE MISSING OUT.  Make sure you ask for the second dipping sauce!)

For the dip, mix together the mayo, garlic, salt, pepper, lemon juice and parsley.  I'm afraid I do not have measurements for these, so use your best cooking judgement.  We LOVE garlic so I put a ton in our aioli, but you may prefer hardly any - up to you!  Put your chef's hat on!


Mix together until creamy!


And that's it, you're done!  It's really pretty low maintenance, right?  


Hopefully your finished product closely resembles the Cheesecake Factory's - I felt like mine did, and I was SUPER happy about this.  Now, if only I could figure out how to grill, and how to make that vinaigrette dipping sauce...!


Tuesday, February 25, 2014

My Favorite! How to Cook and Eat an Artichoke


I love me some artichokes.  I realized today that I have mentioned this several times, but have not actually shown any solid proof of my love for this "exemplary vegetable"(to quote Pride and Prejudice).  Therefore, this post is all about artichokes and my idea of how to cook and eat them.  This is the simplest way, but in my opinion it is the absolute best!  Please excuse the photo's in this post, as I took them awhile back with my iPhone, and they are…ahem…lacking.  But you can still get the idea.  ;)

INGREDIENTS:

  • 1 Artichoke (I prefer the ones from Ocean Mist Farms, if you have access to these.  They can usually be found at Costco)
  • 3 tbs. of butter
  • 1-2 tbs. of mayonnaise, to taste
  • 1 dash of Brianna's Real French Vinaigrette.  (I like to think of this as my secret ingredient…!)
  • Water
  • Large bowl for discarded leaves
  • That's it!!


INSTRUCTIONS:
1.  Take your artichoke and cut off the spiny tops of all the leaves, as they can prick you.  Note that you do not HAVE to do this, but if you are serving them for guests, I like to.  Once you have cut off the spiny tops, use a serrated knife to cut off the entire 1/2 - 1 inch or so of the top of the artichoke.  (I think a serrated knife makes this easier.)


2.  Boil in water for 35 minutes.  I have cooked many an artichoke in my time, and I believe that this is the optimum amount of time!  Once your artichoke is fully cooked, you can start making the dipping sauce.  Melt the butter in a small bowl (I just use the microwave for maybe 30 seconds) and add the mayonnaise to the melted butter.  Drizzle the french vinaigrette over the mayonnaise.  You may choose to mix everything together, but I actually enjoy having the ingredients somewhat separate.

3.  To eat the artichoke, gently pull off one of the outer leaves (it should come off very easily when the choke has been cooked), and dip the end of the leaf (the side that came from the choke) into the melted butter mixture.  You should then scrape off the end of the leaf with your teeth.  NOTE - You do not eat the whole artichoke leaf - just the portion you have scraped off with your teeth!  Discard the rest of the leaf in your discard bowl.


Yumm!  You should now be experiencing the euphoria in your mouth that comes from eating an artichoke!  As you continue to pull off the leaves, you will see the choke getting smaller and smaller.


4.  Eventually, you will get to the point where the leaves are just too small to eat.  Go ahead and brush these small leaves off of the choke.  You will be left with the artichoke heart, covered by the hairy thistle.  Take a spoon, and gently scrape the thistle off of the heart - it should come right off.  Discard the thistle in your discard bowl.


5.  The last step is enjoying the best part of the artichoke - the heart!  In fact, most recipes ONLY use the artichoke heart, so you can be proud of the fact that you have now eaten the entire vegetable.  You know that they say - waste not, want not!

Congratulations - you now know how to cook and eat an artichoke!  If you haven't experienced one before (yes, I think of them as an experience), now is your chance!  Try something new, and please tell me what you thought!  I promise I will not be offended if you absolutely hate them.  Experiment with dipping sauces to find what you like - some people only like melted butter, others prefer hollandaise sauce.  It's up to you!

Ocean Mist Farms even offers an Artichokes Aficionados Club with a drawing for free artichokes every week - if you have fallen in love with them as much as I have, feel free to join.  :)


Wednesday, December 4, 2013

Paint Chip Art


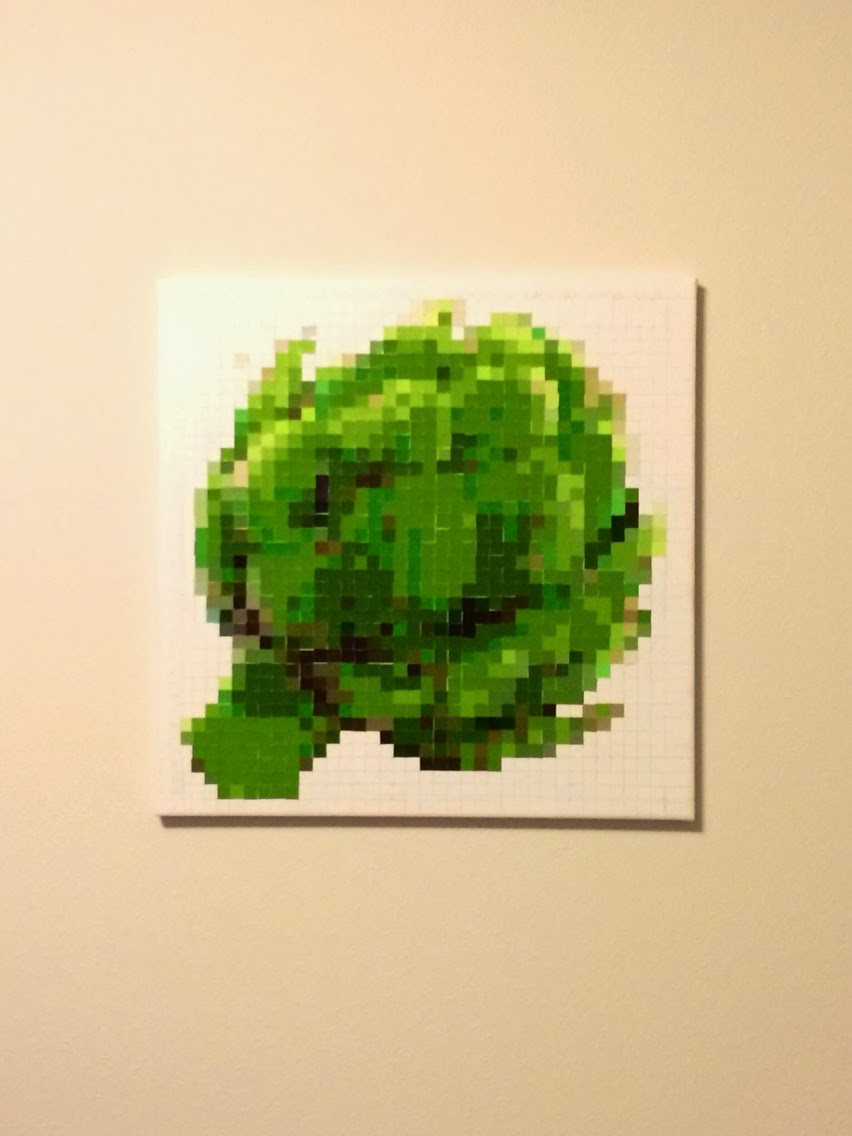
I actually made this about 6 months ago, right before we moved into our house.  I had seen a photo of someone using paint chips to create a giant wall-size version of a Marilyn Monroe picture (inspiration link below), and thought "what an awesome idea!  I have to try it!".  Naturally, I chose to do one of an artichoke.  So here are the steps!  Be warned - this is tedious and time consuming…but the result really is fabulous!  

Materials:
Paint chips.  Lots of paint chips.  (From Lowes - I will explain why.)
A square paper punch
Glue
A canvas  
This website:  http://www.heavymural.com
This program:  Olympic Paints Desktop App, http://www.olympic.com/color/desktop_apps

Instructions:
Choose an image you'd like for your mural - be creative!  When you have an image picked, www.heavymural.com will take any image and pixelate it for you.  (Yes, amazing that it exists!)  I had to try several different images before I was satisfied with how the pixelation turned out, so don't be afraid to play around!  Pay close attention to the "pixels per row" box, as this will determine just how large your mural will be (and how big a canvas you need), depending on how big your square punch is.  I used a 1/2 inch-sized square punch for my artichoke mural.  


Once you have your pixelated image, print it out on your color printer, and draw gridlines through it, separating each pixel.  You will then label letters across the top for each column, and numbers along the side for each row (like a spreadsheet!  This can probably be done on the computer somehow too, but you get the idea).  Now comes the tedious part.  Start a spreadsheet, and make a list of each pixel involved in your mural (Now that you have gridded them out, you can label them A1, A2, A3, etc).  Open the Olympic Paints Desktop App on your computer, and open a digital copy of your pixelated image from HeavyMural.com.  Using the desktop app, you will be able to select each individual pixel from your image, and color match it to the coordinating Olympic Paint color.  BRILLIANT!!  Make a note of each paint color match for each pixel on your spreadsheet, so each pixel has a coordinating color.  (Make a note of the color name and the color code/number, as this will make your life easier when you have to find all of these paint chips at Lowes)  Yes, this will probably take you awhile.  But it is worth it!  Stay with it!

When you are FINALLY finished, you can use pivot tables (if you are excel savvy) or old fashioned elbow grease to count up how many pixel squares of each paint color you will need for your mural.  Now hit up Lowes!  I admit it, I did have to go to 2 different local Lowes stores to get all of the green paint chips I needed for my artichoke.  BUT, remember that they will be put to good use!  Next, you start hole punching with your square hole punch.  (I used envelopes to keep all of my colors grouped together as I went.)  When you have all of your squares/"pixels" ready, you can start gluing them to your canvas!  To be precise, I went through and gridded my canvas with pencil beforehand (you can see this a little in my images), which I do recommend doing.  However, I did have trouble erasing all of the pencil afterwards….so USE CAUTION!  (Let me know if you have a trick to erase pencil from canvas!)


Using your list of pixels and their matching colors, you can now go through and glue the paint chip squares to their coordinating location on your canvas.  This is the best part - you will slowly be able to see your image take shape!  When finished, you can coat the canvas with a sealer (I used acrylic spray). Mod podge may also work!  And VOILA!  Your very own piece of paint chip art!  (And for super cheap!!)


Inspiration:
Apartment Therapy Reader Project: