Showing posts with label Paint Chips. Show all posts

Sunday, January 12, 2014

Gift Idea: DIY Paint Chip Gift Tags

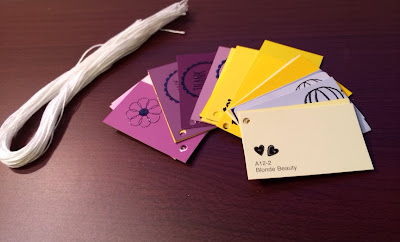
I have a lot of paint chips lying around, and not just from my artichoke paint chip project.  There is something so inspiring about them to me - the gorgeous arrays of colors, and then the beautiful color NAMES!  Who comes up with those names?  "Evening Hush" (blue), "Stained Glass" (blue), and "Happenstance" (also blue).  "Old Mission Pink" (pink), "Palisade Orchid" (pink) and "Santolina Blooms" (you guessed it… another shade of pink.)  Who knew that happenstance had it's own color?  Because I find paint chips so inspiring, I had a color wheel of paint chips laying around that I have wanted to do something with.


So, as they are about the same size, I thought that my paint chips would make perfect gift tags!  (And I was right!) 


Materials:
Paint Chips
Rubber Stamps
Embossing Powder (if desired)
String
Hole Punch

Instructions:
Cut your paint chips accordingly.  Collect some appropriate rubber stamps for your gift tags (I particularly like the "to/from" stamp and the "thank you" stamp for this purpose - if you don't have these types of rubber stamps, they are readily available on Etsy!)  I also preferred to emboss them rather than simply stamp them, as I thought this gave the tags a much more finished look.  For those who are scared of embossing - DON'T BE!  It's as easy as sprinkling some powder and waving a hair dryer.  I was suckered into it in a stamping store and talked into buying an actual embossing gun, and when I actually used it…I realized that I had just paid $30 for what is essentially a hair dryer, which of course I already owned.  Now you are in the know!


Use a hole punch and punch a hole in the corner of the paint chip, and tie some string through it - now it is gift ready!  These would also make a really adorable gift for someone by themselves - just package them up in a pack with some string.  (I used embroidery thread, which seemed to be the perfect consistency for this.)  


Now happy gift giving!  These could also be used as tags for wedding favors or for escort cards.  I know I would would feel pretty special receiving a gift with a tag with it's own special, inspirational color on it…!


Wednesday, December 4, 2013

Paint Chip Art


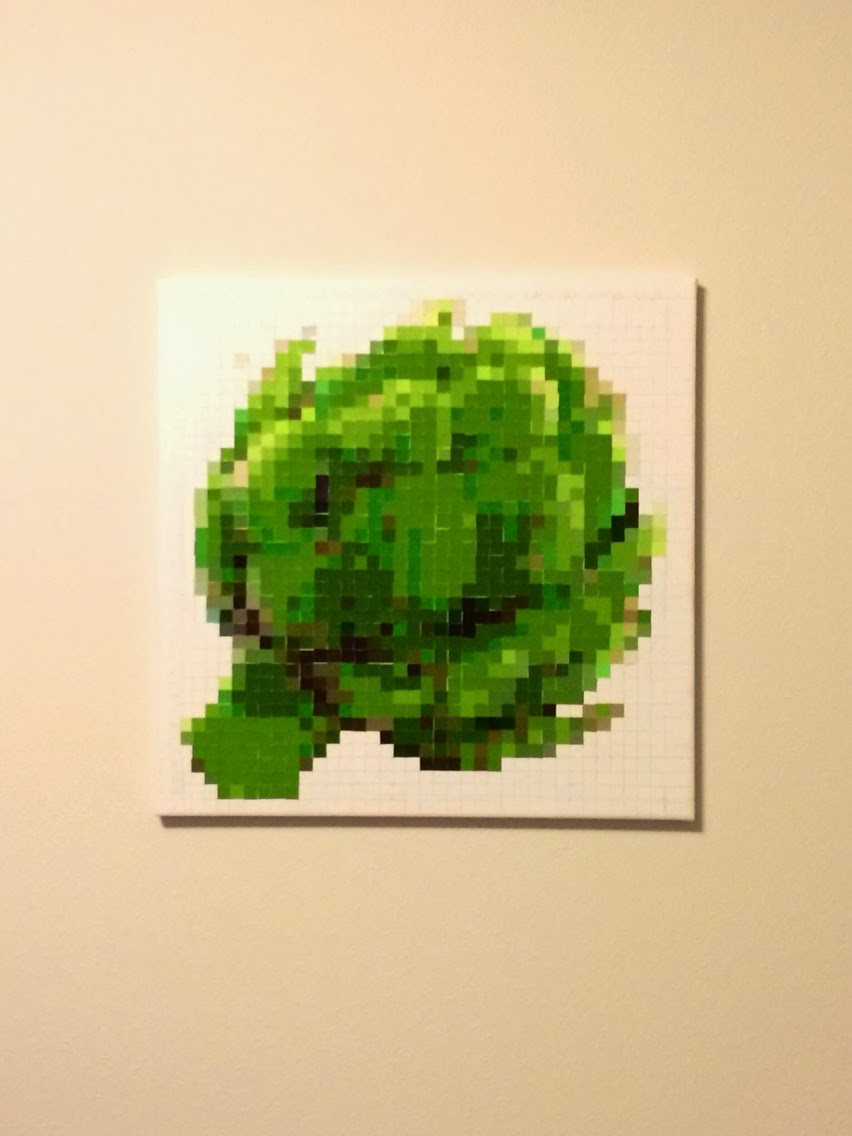
I actually made this about 6 months ago, right before we moved into our house.  I had seen a photo of someone using paint chips to create a giant wall-size version of a Marilyn Monroe picture (inspiration link below), and thought "what an awesome idea!  I have to try it!".  Naturally, I chose to do one of an artichoke.  So here are the steps!  Be warned - this is tedious and time consuming…but the result really is fabulous!  

Materials:
Paint chips.  Lots of paint chips.  (From Lowes - I will explain why.)
A square paper punch
Glue
A canvas  
This website:  http://www.heavymural.com
This program:  Olympic Paints Desktop App, http://www.olympic.com/color/desktop_apps

Instructions:
Choose an image you'd like for your mural - be creative!  When you have an image picked, www.heavymural.com will take any image and pixelate it for you.  (Yes, amazing that it exists!)  I had to try several different images before I was satisfied with how the pixelation turned out, so don't be afraid to play around!  Pay close attention to the "pixels per row" box, as this will determine just how large your mural will be (and how big a canvas you need), depending on how big your square punch is.  I used a 1/2 inch-sized square punch for my artichoke mural.  


Once you have your pixelated image, print it out on your color printer, and draw gridlines through it, separating each pixel.  You will then label letters across the top for each column, and numbers along the side for each row (like a spreadsheet!  This can probably be done on the computer somehow too, but you get the idea).  Now comes the tedious part.  Start a spreadsheet, and make a list of each pixel involved in your mural (Now that you have gridded them out, you can label them A1, A2, A3, etc).  Open the Olympic Paints Desktop App on your computer, and open a digital copy of your pixelated image from HeavyMural.com.  Using the desktop app, you will be able to select each individual pixel from your image, and color match it to the coordinating Olympic Paint color.  BRILLIANT!!  Make a note of each paint color match for each pixel on your spreadsheet, so each pixel has a coordinating color.  (Make a note of the color name and the color code/number, as this will make your life easier when you have to find all of these paint chips at Lowes)  Yes, this will probably take you awhile.  But it is worth it!  Stay with it!

When you are FINALLY finished, you can use pivot tables (if you are excel savvy) or old fashioned elbow grease to count up how many pixel squares of each paint color you will need for your mural.  Now hit up Lowes!  I admit it, I did have to go to 2 different local Lowes stores to get all of the green paint chips I needed for my artichoke.  BUT, remember that they will be put to good use!  Next, you start hole punching with your square hole punch.  (I used envelopes to keep all of my colors grouped together as I went.)  When you have all of your squares/"pixels" ready, you can start gluing them to your canvas!  To be precise, I went through and gridded my canvas with pencil beforehand (you can see this a little in my images), which I do recommend doing.  However, I did have trouble erasing all of the pencil afterwards….so USE CAUTION!  (Let me know if you have a trick to erase pencil from canvas!)


Using your list of pixels and their matching colors, you can now go through and glue the paint chip squares to their coordinating location on your canvas.  This is the best part - you will slowly be able to see your image take shape!  When finished, you can coat the canvas with a sealer (I used acrylic spray). Mod podge may also work!  And VOILA!  Your very own piece of paint chip art!  (And for super cheap!!)


Inspiration:
Apartment Therapy Reader Project: