Showing posts with label DIY. Show all posts

Monday, October 5, 2015

Leaf it Better Than You Found It


Fall leaves... is there anything that makes you want to go make yourself a cup of tea like fall leaves? Whenever I see a pile of leaves, I am suddenly inspired to curl up with a cup of Constant Comment (yes, I am a fan).  There are a million and a half things to do with fall leaves out there on the internet, so I thought I would go ahead and add to this craziness by creating my own fall leaf round up.  

To anyone listening, here is my #1 tip for collecting your own fall leaves for craft projects - try and collect leaves that are as DRY as possible.  Nobody wants soggy leaves - not pretty.  Any leaf that comes from outside will have some moisture in it, so also make sure you DRY it thoroughly before doing anything crafty with it!

Anywho, here we go:

  1. Gold Painted Leaves from Dio Home Improvements.  This project looks super simple, but the end result is utterly sophisticated - you could even "leaf" it up all year round!  (Hah...yes I did).


2.  Leaf Art from Just a Girl Blog.  I thought this one was unique, and it certainly makes for an eye catching end result.  Doesn't the idea of hanging this up in your dining room make you want to host Thanksgiving this year??  (Haha, or not.)

3.  Fall Candle Centerpiece from That's What Che Said.  Speaking of hosting Thanksgiving, if you are lucky (or un-lucky) enough to have such an honor, you'll need at table centerpiece!  This would be super easy (and cheap) to throw together with some dollar store candles, and looks very festive!

4.  Fall Leaf Mason Jar by Gingerbread Snowflakes.  I had to add a Mason Jar project in here, #BecauseMasonJars.  While I'm hash tagging, #BecauseModPodge works for this one too!  (I think all crafters should be worshipping both Mason Jars and Mod Podge on a regular basis.)  Would be lovely as a candle, or just to hold your extra bits and pieces in! 

5.  Realistic Leaf Roses from FabDIY.  This one is my favorite, because I've never seen anything like it!  Look how beautiful those leaf roses look!  I'm dying to try this, but it looks like something you'll need to have a certain touch for, and I'm worried about wasting some of my precious dried leaves from last fall.  If I try it, I'll let you know!


Monday, September 21, 2015

Show Your Stripes!

Note that there are still imperfections in the wax here.

So here I am - another candle project.  Like I was saying during my last candle project, candles are SO EASY TO MAKE, so why doesn't everyone do it??  Get yourself a glass vessel and some wax, and you're practically good to go!  Granted, the candles I have been making still have some odd white stuff on them after they dry.  Google tells me that this happens because of the way the wax cools, and how I should used mixed wax rather than pure soy wax to avoid it.  Who knows - I still have several pounds of soy wax to use, and a little white residue can't stop me!  Plus, doesn't it add to the DIY charm?

Materials:

Instructions:

Melt your first layer of wax and add your dye according to the instructions.  Google told me that warming your glass vessels prior to pouring in the wax will help avoid the white residue, but because of the striped nature of these candles, I couldn't do this.  If you're worried about white residue, it's something to keep in mind!

After pouring in your first layer, drop your wick in while the wax is still wet.  I had to use my stir sticks to balance the wick, since everyone wants their candle wicks to be straight up, obviously...!

Keep on melting your wax layers and dying them different colors accordingly.  Depending on the size of your glass vessel, you may have different amounts of wax, dye and layers.  Get creative with it!

I made 8 of these striped candles to give away as gifts for Christmas.  (Aren't I so on top of it...?  And it's only September!  Boom!)  I think they are fun, and you don't see very many striped candles to buy.  After all, if you can make it, why would you buy it!

Enjoy!


Monday, August 24, 2015

Waxing Eloquent

Kindly ignore the white residue...!
Brace yourselves... I have officially gotten into candle making!  I am certainly not an expert at this point, but so far my feelings about making candles are similar to my feelings about making soap:  it's surprisingly easy, and why doesn't everyone do it?  There are also endless possibilities to be creative and make them your own.  Even better!  I also had plenty of candle making supplies leftover from my tea cup candles that I gave away at my bridal shower.  I actually got this project from Brit + Co, only their project used crayons to color the candle wax, which I do NOT recommend - it causes the candles to smell strange when they burn, and to melt a little funny.  (Side note - I think working for Brit + Co is my dream job.  It appears that their staff spends their days just coming up with interesting recipes and projects.  I could get used to that!)

Materials:
  • Candle Wax (I used this soy wax.)
  • Wax dye (I used this dye!)
  • Glass votive holders
  • Plate Stand (or something else jerry-rigged)
  • Wicks
  • Wick stickers
  • Dixie cups (if melting your wax in the microwave)
  • Stir sticks
Inspired by:  Color Block Candles at Brit + Co


Instructions
Start by making sure you can prop your glass votive holders at an angle with your plate stand.  You might need to get creative here - I ended up using some old styrofoam to get this to work, but the bottom line is that it did the trick!  Note that this is where your wick stickers come in, so your wicks stay in place.  Stick your wicks into the glass votives once you've gotten everything to stay!


Next, melt your wax chips inside your dixie cups using the microwave.  You might have a more sophisticated setup for melting your wax - if so, aren't you something!  I added my wax dye chips prior to melting the wax, and melted for 20 second increments - I think it took 5 or so times before the wax started to melt.  Note that you'll need to stir the wax A LOT, as the dye stays chunky unless stirred well!

 I made 3 candles and wanted them each to have the colors in a different order, which means I was doing a lot of batches of colored wax, but you can do whatever you want!  Once the wax is melted, carefully pour it into the tilted glass votives for your first layer.
Be careful not to get the wax on the votive!  I made a few mistakes here... but it's a pain to clean so take your time!   Now wait for the wax to harden - make sure you don't move the votive until it's hardened completely.  When ready, turn the candle around so it's tilting the other way, ready for you to pour in your next layer!  Melt more colored wax, and be just as careful pouring in your second layer.  Remember to wait for it to dry!
Looking good!
For the last layer, you don't need to tilt the candles.  (Finally, right?)  Carefully pour in the rest of your colored wax, and wait for it to harden.

Voila!  Don't they look lovely?  Maybe it is because if my novice candle making skills, but my finished product got this strange whiteness around the glass.  I'm not sure what this is from, but it's strange because earlier in the project this wasn't visible.  I still love how they turned out, but be warned - hopefully this doesn't happen to you!


Wouldn't these also make a lovely gift?  Especially given in a trio, like a set.  Perfect!  Now, if only I can figure out how to get rid of that white stuff...!


Monday, May 18, 2015

Mason Jar Mania


Just like any good crafter, I love me some mason jars.  Cheap, accessible, versatile - what's not to love?  There are SO many mason jar projects floating around out there, but I wanted to put together my own round-up of projects that are currently on my list.  Some of these are pretty simple, but I think the charm of mason jars is in the simplicity of it all.  The trick is making each project your own - most of these would also make wonderful gifts!

1.  Sea Glass Mason Jars from My Honey's Place.  What a beautiful way to cheaply dress up your mason jars to match any decor!

2.  Mason Jar Candles from Candy and Clothes.  Simple, yet elegant and easy.  Add a ribbon or some twine, and you have a perfect gift.  

3.  Mason Jar Cocktail Gifts from Something Turquoise.  I think these are SO CUTE!  What great favors for a party!  Check out the original tutorial (linked above) for the full range of possibilities - there are several!

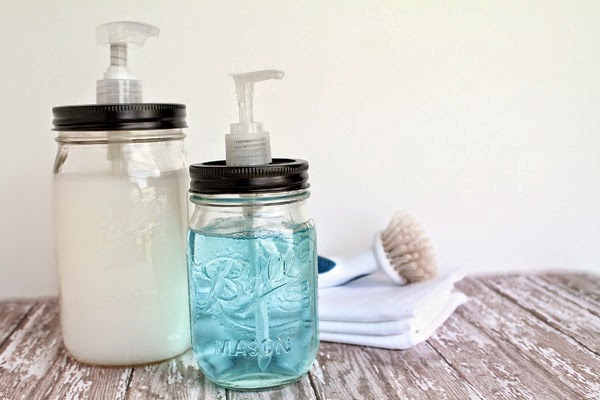
4.  Mason Jar Soap Dispenser from Love Grows Wild.  This project has been on my list for quite some time.  I love the idea of making these for all of our bathrooms - they would also make a great gift!  

5.  Keep Matches in a Mason Jar - with a Strikeable Lid from The Burlap Bag.  Doesn't this look like a great idea?  Give one of these with a mason jar candle for a complete and thoughtful gift! 


Monday, April 27, 2015

Wedding Craft Extravaganza

As you may remember, I am engaged.  Being I have been writing here less and less over the past year (shameful, I admit) I understand how that fact might be easy to forget at this point.  Fortunately, my long engagement has allowed me to focus on several wedding crafts over the past year, which I will now list in detail.

Now, I probably don't need to explain that a craft addict planning a wedding is like throwing gasoline on an already steady flame.  Sure, I always had a few crafting projects happening here and there, but suddenly I had a wedding date and a timeline and a whole new myriad of crafting opportunities awaited me.  

Shipley has enjoyed helping me with my wedding crafts.  In this case, he played a pivotal role with the invitations.

The following is my list of DIY projects that I've been working on for my "big day".  Some are finished at this point, some are not, but I am determined for all them to make an impact on my wedding guests.  If I was a blogger who had more time I would have drawn out each project into it's own blog post, but alas... perhaps that can be a project for when I have professional photo's of the finished products.

1.  Crepe Flowers in Painted Bottles.  I bought a case of 20 small bottles on Etsy, coated the insides with purple paint, waited far too long for the bottles to dry and voila - purple bottles.  I have also made dozens and dozens of crepe paper flowers to go inside the bottles for extra decor.  


2.  Wine Cork "Bar" Sign.  One of my bridesmaids helped me with this one.  Rather than drink myself into oblivion to obtain hundreds of wine corks, I copped out and bought used wine corks on Etsy.  (What a job, selling used wine corks!  There is a market for anything, people!  After all, I totally bought them...!)  Using my trusty glue gun, this project was surprisingly easy - and will hopefully bring a little something extra to my bar area!


3.  Lucky Bamboo Centerpieces.  Guys, flowers are expensive.  An alternative fresh solution that is not expensive?  Lucky bamboo!  Bonus: my fiance is Chinese, and bamboo is a symbol of luck and fortune in Chinese culture.  Perfect!  I ordered a bunch of lucky bamboo online in bulk, gathered some square vases and pebbles from the Dollar Tree (the dollar store literally has everything - don't buy it unless you've checked the dollar store first!), and boom - centerpieces complete.  

Confession - I actually ordered and assembled my lucky bamboo centerpieces several months ago so they had time to grow and become leafy, but sadly this was not successful.  Unless you are accustomed to turning a room of your house into a small greenhouse, I recommend waiting until you are closer to your event date...!  


4.  Crepe Flower Escort Cards.  This one was super time consuming.  Thank goodness for Gilmore Girls and Netflix.  Almost a year ago, I saw something on pinterest about having a paper flower escort card for each wedding guest with their table number on it.  I immediately thought:  "what a lovely idea!".  I promptly bought plenty of crepe paper, floral tape and floral wire.  Some day I will do a blog tutorial on crepe flowers, because they really are SO EASY and SO INEXPENSIVE.  Just prepare yourself if you need to assemble 300 of them, like I did...  wow.  Anyway, I am now finished with them, and hopefully the majority of them won't end up on the floor at the end of the night...!


5.  Crepe Flower Topiaries.  At weddings there are a lot of tables.  Dessert tables, guestbook tables, gift tables, snack tables, buffet tables, favor tables, the list goes on.  How does one decorate all of those tables??  Topiaries were my answer, although I certainly won't have them on every table.  These took me FOREVER - again, a great idea in theory, but super time consuming in practice.  To assemble, I bought tiered tealight holders from the dollar store and super glued them on to foam balls from Michaels.  Then, I assembled hundreds of crepe paper flowers, and hot glued them to the foam ball.  I made 8 topiaries, and each one took me 2 episodes of Gilmore Girls.  (And I only burned myself TWICE!)
Cameo by Rory Gilmore.

6.  Teacup Candle Favors.  These are actually going to be favors at my bridal shower.  I know technically it is a small faux pas for me to be providing my own bridal shower favors, but come on!  How could I not??  I have obviously not made these yet, but am in the process of collecting teacups from local thrift stores.  You can find some gorgeous ones for very cheap if you take the time to look. (Shout out for www.ShopGoodwill.com)  So pretty!

This concludes my list of wedding crafts - all in all, I think I showed a fair amount of restraint.  Hopefully I will have some lovely finished photo's of these crafts in the future.  In the meantime, I hope I have inspired you with a couple of new projects.  Details to come!

Monday, December 1, 2014

Polka Dots


Personalized gifts are the best gifts!  Taking the time to actually make something for someone else is so meaningful, but going the extra mile to make something specifically for that person is even better.  This is another DIY craft where I was able to utilize some leftover materials from past projects - namely my Pebeo Vitrea Paints from my Decorative Jar project.  (Pebeo Vitrea Paints are glass paints that are glossy and transparent when used on glass.)  I have used Sharpies to decorate mugs before, but over the course of a few washings the sharpie inevitably washes off… which is why Glass Paints should be your new best friend!  

Materials: 
White or Solid Colored Mug
Glass Paint (Such as Pebero Vitrea Paints)
Fine Tipped Paintbrush 
Letter Stencil(s)
A Working Oven

Instructions:
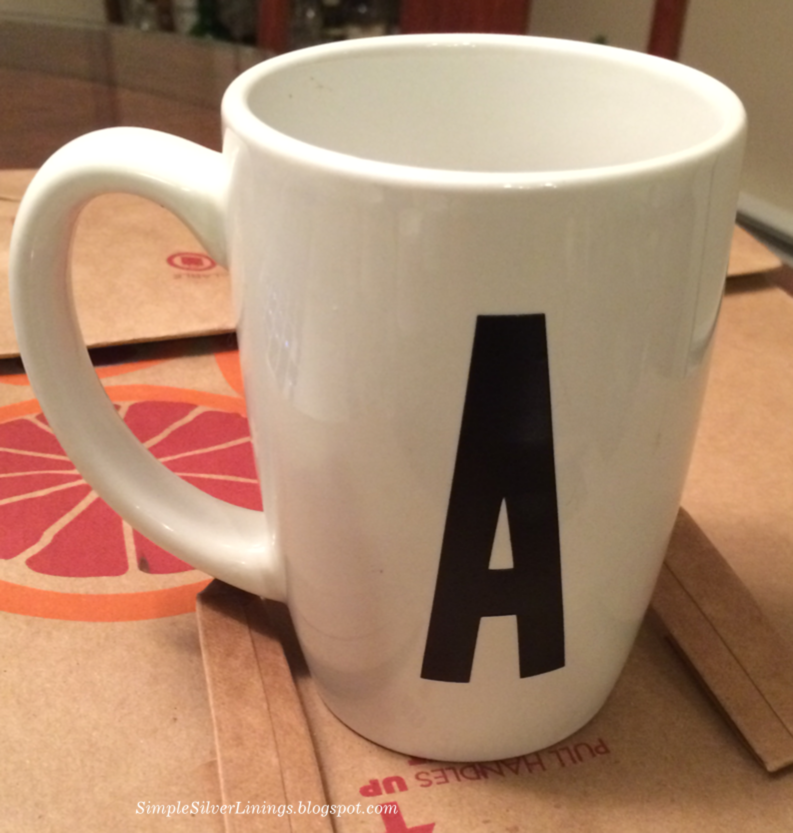
Start by sticking a letter stencil onto your mug.  I used an initial, but you can also spell a word if desired!  Take your paintbrush, and begin painting dots all around your stencil.

Carefully cluster your dots closer together near the center of the stencil, and work outwards making your dots farther and farther apart.  This creates a lovely illusion of an exploding initial…!


What a wonderful gift to surprise someone with - their very own Monogrammed Mug!  You can also get creative with the mug and paint colors.  I strongly restrained myself when painting, as I was VERY close to using several different colors when painting around my "A".  However, if I have learned anything from crafting, it is that less is definitely more…  If anyone tries a multi-color Initial Mug, please let me know!  

NOTE:  When using glass paints, don't forget to "fire" your painted mug in the oven at at least 350 degrees for about 40 minutes - this keeps your new masterpiece dishwasher safe!  I have seen similar mugs made with Sharpies, but please be aware your Sharpie marks will NOT last when your mug is washed.  For permanent decor, use glass paint!!   

INSPIRED BY:  DIY Painted Mugs that Won't Wash Away by GluedtomyCraftsBlog.com  

Monday, November 24, 2014

No Kidding: Homemade Goatsmilk Soap


I have thought about making soap plenty of times before, but never actually got around to it.  However, after my purchase last year of Essential Oils (one of the best crafting purchases I have EVER made) to make Bath Fizzies, what better way to use up glorious scents such as Lavender and Lemon?  Truth be told, I have looked down on Melt and Pour soaps in the past as an easy "cheating" version of a DIY craft… but after realizing just how many things you can do with it (without giving yourself a chemical burn from working with Lye), I'm honestly very pleased with the possibilities!)

Materials:
2 pounds Goatsmilk Soap Base (Readily available at any craft store)
Essential Oils
Loaf Pans or Molds (You can get loaf pans specifically for soap making, but I got one made for baking, and it worked like a charm!)
Extra's!  (Honey, Shea Butter, Oils, Oatmeal, Salts, Dried Flowers, the sky is the limit!)
Crinkle Cutter (Optional)

Instructions:
Cut your soap base up into chunks, and melt in the microwave in 30 second increments.  When melted, mix in your essential oils (I used about 45 drops), along with any extra's you'd like to add to your soap. If you are adding any oils, be careful to not overload your soap so it can still set up properly.  

I made two kinds of soap - Lemon with Honey and Oatmeal, and Lavender with Himalayan Sea Salt that I layered when pouring the soap.
Pour your melted soap mixture into the loaf pan, and let sit for at least a couple of hours.  Mine took anywhere between 2 and 4 hours to set up completely.  Once your soap has set up, release it from your loaf pan (or mold), and slice it with your crinkle cutter (or a regular knife).  


Voila!  Homemade Goatsmilk Soap. I'm still deciding how to package these before giving them as Christmas Gifts, so I may revisit that topic here.  Mostly, I just love how rustic these soaps look… I feel like I could have found them in a farmer's market, and yet I just made them in my kitchen!

Note:  I purchased my Essential Oils here.  Trust me - one of my best purchases!  I might just have to make more bath products with them…!  :)  I also followed Martha Stewart's instructions for the Lavender with Himalayan Sea Salt soap.