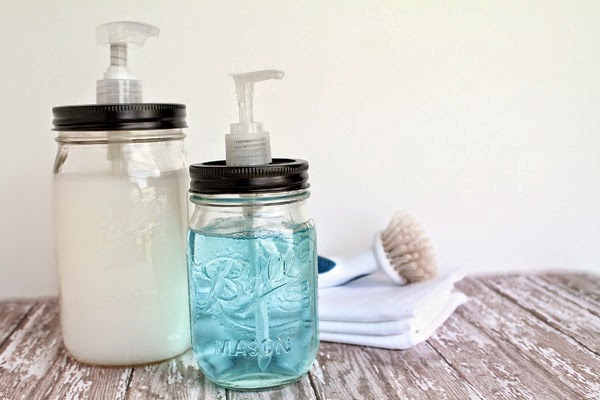
Just like any good crafter, I love me some mason jars. Cheap, accessible, versatile - what's not to love? There are SO many mason jar projects floating around out there, but I wanted to put together my own round-up of projects that are currently on my list. Some of these are pretty simple, but I think the charm of mason jars is in the simplicity of it all. The trick is making each project your own - most of these would also make wonderful gifts!
Showing posts with label Mason Jars. Show all posts
Monday, May 18, 2015
Monday, January 20, 2014
Centerpieces on the Cheap
I was planning a large dinner for a work event recently, and while we didn't actually end up using these for centerpieces (we ended up going the traditional route and used a bunch of fresh flowers), I still thought they were pretty cool - especially if you wanted to try something a little different and/or extra colorful. Note that an LED candle is a must here, since a real candle might catch the tissue paper on fire… which would be no good for your event…!
Materials:
Tissue Paper
Glass Jars
Scissors
LED Candle
Instructions:
Create flowers out of your tissue paper. I followed this amazing guide to determine what kind of tissue flowers to make, how to cut the tissue, etc (from my Pinterest):
Put an LED candle in your glass jar, and put the tissue paper flower on top. Donzo! You could also make a bouquet of these if you like - what a lovely way to decorate for a party!
share this post » |
{Facebook} | {Twitter} | {Pinterest} |
Thursday, January 9, 2014
Gift Idea: DIY Decorative Jars (Filled with Goodies, and Reusable!)
A couple of months ago, I got REALLY into painting glass, and bought an assortment of the Pebeo Vitrea glass paints. What is really cool about these is the fact that you can just put your painted glassware in the oven, and it essentially fires it for you, making your item reusable. Fabulous! I couldn't get enough. :) I also recently had an obsession with mason jars, so fortunately I had plenty of glassware around to experiment with. While most people use glass paints to decorate actual glassware (drinking glasses, wine glasses, martini glasses, etc) I hadn't seen as much of mason jars being painted, and I thought this was an excellent idea. So, I grabbed a few mason jars, and got to work! These turned out perfect for Christmas gifts this past year, and the best part about them is that your giftee can re-use the jar... so it's essentially 2 gifts in 1! A word of caution - I found glass paints rather addictive, so try and control yourself.
Materials:
Glass Paint (I used Pebeo Vitrea Paints)
Paint brushes
Glass Jars
Colorful Baking Cups
Goodies to fill your jars with (I made Martha Stewart's Bath Fizzies - http://www.marthastewart.com/271871/bath-fizzies) Candy would also work!
Instructions:
Gather your mason jars, and decorate with the glass paint as you see fit! I like the confetti look, as it's simple and turns out nice and elegant.
Fire your painted mason jars according to your paint's instructions.
Fill with your goodies! I put the baking cups over the mason jars right before I screwed on the rims, giving them a more decorative look. I also printed out some labels to describe my bath fizzies, and attached a tag that read: "A note about the jar: I have been fire-sealed and am re-usable! Use me with candles or for storage!"
And there you have it - two gifts in one! I really like how they all look in a row. :)
Inspiration: "Easy Anthropologie Confetti Tumbers" on Radical Possibility: http://www.radicalpossibility.com/2012/06/easy-confetti-tumblers.html
share this post » |
{Facebook} | {Twitter} | {Pinterest} |
Sunday, December 1, 2013
Jack-O-Lantern Luminaries
I realize it is now December, but I made these for Halloween a few months back and wanted to get them on here before long! They turned out super cute, and I plan to get them out again next year. (What better thing to feature for my first post!) Highly recommended for a porch or in the window. :)
Materials:
Mason Jars
Colored tissue paper
Black construction paper
Mod podge
Sponge brush
Instructions:
Tear the tissue paper into strips, and glue the strips to the side of the mason jar (covering completely). Once covered, paint mod podge over the tissue-covered jar with the sponge brush. (I found a sponge brush worked much better than a paintbrush...!) Leave to dry overnight.
Cut out jack-o-lantern faces from the black construction paper (pumpkin-type faces for the orange jars, Frankenstein faces for the green jars, etc!) and glue onto the tissue-covered jars with more of the mod podge. Leave to dry, and pop a candle into the jar for a pleasing glow! (I found a tea light was difficult to light inside the jar, so an LED tea light worked perfectly!)
Inspired By:
Our Best Bites (they also have a link to get the jack-o-lantern face templates!)
share this post » |
{Facebook} | {Twitter} | {Pinterest} |
Subscribe to:
Posts (Atom)


share this post »